
GENESIS of a Modern Gravel Dreambike

If you’ve read some or all of my pieces on gravel bike design and materials (the collection can be found here), and/or have followed my Instagram account over the 18 months, you’ll have noted I’ve been fortunate enough to test out some of my theories about both gravel geometry and materials through collaboration with T-Lab in Montreal. After spending a month riding a demo X3 in Europe in 2018, I was convinced I loved the pedaling dynamics of their titanium frame, but was uncertain about how ‘my’ geometry would play out with the same tubing specification the demo was built with. The folks at T-Lab were interested in finding out too, so after a short period of back-and-forth around the design in early 2019, they built my frame and had it ready to pick up while I was in Montreal for a wedding in September. Cyclocross season was starting up, so I wasn’t able to put in a tonne of riding on the bike that fall, but I did put in few long trail-&-tarmac rides, a couple cyclocross races, and a smattering of snirt rides.
In 2020 I did a solid block of riding on the bike, bringing it up to 4,000 km. In the spring, given the situation with the pandemic, I didn’t have access to some of the riding I’d typically do on such a bike, but as the situation improved through May it became possible to ride trails and put together exactly the sorts of rides I wanted a ‘modern gravel bike’ for. Later in the season I built a new hardtail mountain bike, which shifted the T-Lab’s use-range. I’ll talk about that more later on, but the concept to ponder here is that each bike that enters our lives becomes part of our personal cycling ecosystem. This ecosystem is comprised of bikes that exist in relation to each other, as one might plot on a venn diagram. This ‘personal ecosystem’ is like a Russian doll, nested within that of that which is comprised of everyone you ride bikes with. Your bike, how it ‘works’, how you perceive it, ‘what it can and can’t do,’ is relative to how you see the bikes of your riding companions. And often, this isn’t just about perception, like when that one rider shows up to the all-road ride on 25mm tires and says, ‘25s will be fine, right?’ ‘Well, ok, I guess we’re doing another route than planned….’
Each riding group/ecosystem is nested within that of its regional scene, which is in turn nested within national and international cycling ecosystems. Riders are now feeling this interconnectedness more than ever, due to supply-chain issues!
All this ecosystem stuff is to say that bikes are both complicated and complex. As you change one or more elements of a given bike your own, shifting its use-range, these changes influence the use-range of other bikes within its community. Many riders, when committing their hard-earned dollars to a custom bike, will feel anxious about ‘getting it wrong’, and try to manage that risk by creating a bike that will ‘do it all’, be a Jack of all trades. Unfortunately, this will often lead to a collection of bikes that are all masters of none, and it’ll actually be challenging to choose the most suited bike for a given ride; the lines will be too blurred. So we’re talking about diversity between species here, not within species.
Let your road bike be a cheetah.
Let your all-road bike be a gazelle.
Let your gravel bike be a wolverine.
Let your mountain bike be a mountain goat.
Method and Madness: Two Hypotheses
Let me cut to the chase: I LOVE my X3. It’s my favourite bike, the sole steed I’d keep if I had to liquidate the rest. There’s no one reason for this affinity, it’s based on a slew of factors.
Since I started riding T-Lab’s bikes in 2018, I’ve had many conversations with riders about their bikes, and the majority of these conversations centred on format and geometry. I’ve been musing about more appropriate geometry for drop-bar bikes being ridden off paved surfaces for years, but it was never possible to test my theory until T-Lab and I started this build process. Over the course of many consultations with friends and folks who reach out online, I’ve developed something of a ‘process’ for walking through requirements for a custom build. If there’s anything I’ve learned over the years, it’s that the rider’s priorities need to be established when setting out to design a custom bike. I mean, assuming the bike is for riding. Not all custom builds are for riding. . . .
Let’s walk through how I approached my X3 design process, which was driven by two hypotheses:
‘Modern geometry’ would improve on the handling weaknesses I’d experienced on cyclocross bikes adapted for gravel use
T-Lab’s standard titanium tubing spec would feel good overall when coupled with my custom geometry
If I wanted to compare apples-to-apples against materials I’ve spent many hours on, I’d have exactly replicated the geometry of my recent Brodie Romax bikes (the aluminum and carbon ones are virtually the same geo). However, these frames don’t have reaches as long as I actually need/prefer for gravel riding.
There is way too much to cover about this bike, design methodology, and results in one piece, so I’ll unfurl it in three: Genesis; Execution; Implementation.
Numerous conversations with folks over the last year about custom T-Lab frames really helped me understand the challenges an open canvas presents. This is the ‘paralysis by analysis’ issue, in many cases, which means it’s vital to approach the design process in a deliberate and progressive manner. By this, I mean, once a decision is made about a certain parameter, it’s done. Finished. Move on. Second-guessing can be avoided by following a thorough process. What makes this particularly challenging for folks when creating a titanium bike is that they feel like ‘forever bikes,’ due to their fantastic durability. It’s important to understand that industry standards never stand still, so most of the time a custom bike will wind up ‘locked into’ the components of its era; future-proofing is impossible to achieve. That said, there are certainly steps that can be take to build as much future-proofing into a bike as possible.
Below I lay out my design approach, which essentially mirrors how I talk to whomever when the topic of a new bike design (or match-making to stock builds) comes up. If you’d like to read more on frame materials, voila.
Priorities
Some of us are fortunate enough to have more than one bike, perhaps multiple bikes within categories. I have six drop-bar bikes at the moment. If I was asked to differentiate them, beyond the superficial-level, I could do so, because each bike is a unique species set up distinctly to cover a particular set of priorities. If I were offered a new bike from a brand that makes ‘everything,’ I’d have to think long and hard about any gaps I have within personal and riding-group ecosystems, or options that might simply replace a bike and do what the outgoing one was doing, but better. In ecosystem terms, the bike would have to be better adapted/evolved to thrive than its predecessor.
A few of my priorities are implicit. For example, my bikes need to be durable. If we were to take the term literally, my priority would be durability; it would trump all other attributes. A broken bike is of no use to me, and I don’t tolerate disposability. I want bikes to still be structurally sound if or when I get tired of them or no longer need them. Some riders will lean toward light weight as a top-priority, because this is the characteristic that makes them most excited about their bikes. Others will see aesthetics as predominant in their vision for a bike, while many will focus on ultimate polyvalence as their goal; an ultimate Jack of all trades.
And so enters the concept of the ‘quiver-killer.’ The oft-asked question is: can a good gravel bike do it all well, by simply changing wheels and tires according to ride requirements? The simple answer is, 'it depends.’ The primary difference between drop-bar bikes, as tire clearances have crept up, isn’t aerodynamics of the frame; it’s body position on the bike.
It’s kind of simple: for the most aggressive gravel riding, one will want a body position similar to that of a cyclocross bike, which is far more upright and short than a road bike, but not as high and short as an MTB. At the opposite end, a road position is as low and long as it gets. Thus, if you want a gravel bike to accommodate everything from slow, technical trails to fast road, you’ll wind up with a ‘master of none’ body position. The only way around this is to swap stems, at minimum, between different format rides, which is a risky proposition with carbon components. I.e., a really bad idea. Bars are also rather different from one end of the spectrum to another, and only Canyon has addressed this with their adjustable bar. So, unless/until we start to see safe stems that are adjustable in length and height, while also being light enough to be desirable, NO, individual gravel bikes can’t ‘do it all’ just as well as dedicated platforms. It’s important to consider this when shaping your vision for your custom bike, especially if it’s to be a dream bike.
Let’s assume everyone wants a bike that is durable enough to do the job until we’re ready to turn it into a rain bike or whatever. Let’s roll on into the process of developing a concept of operations for your custom bike, and associated requirements identification, which will relate to a variety of priority areas. This process involves asking oneself the following key questions:
What terrain will I ride the bike on?
How will the bike be ridden, and in what context?
Is there a bike I have ridden that can be used as a reference point for geometry and layout?

(1) Terrain use-case
Pre-pandemic, I expected to continue racing a variety of gravel events ad nauseum, to spend time in the Carolinas each spring, and take on various riding trips on the continent and beyond. When I travel I don’t like my tires to constrain my explorations, so I tend toward high-volume options. I mostly ride alone when I’m in Europe, so I stay way from more dangerous riding, like rocky trails. This means I don’t need tires for the full-spectrum of terrain I ride at home; knobs would be overkill. Riding solo presents a different use-case than riding with friends, just as riding familiar terrain might present a different use-case than unfamiliar terrain. All of this was part of my concept of operations for my X3, a bike that would fit into an ecosystem of bikes that both define and evolve (to) my art of the possible.
We always have to begin a bike design with a wheel size selected, and a tire size range in mind: min/max. Honestly, this can be the hardest part!
Design Element: Wheel diameter and tire size
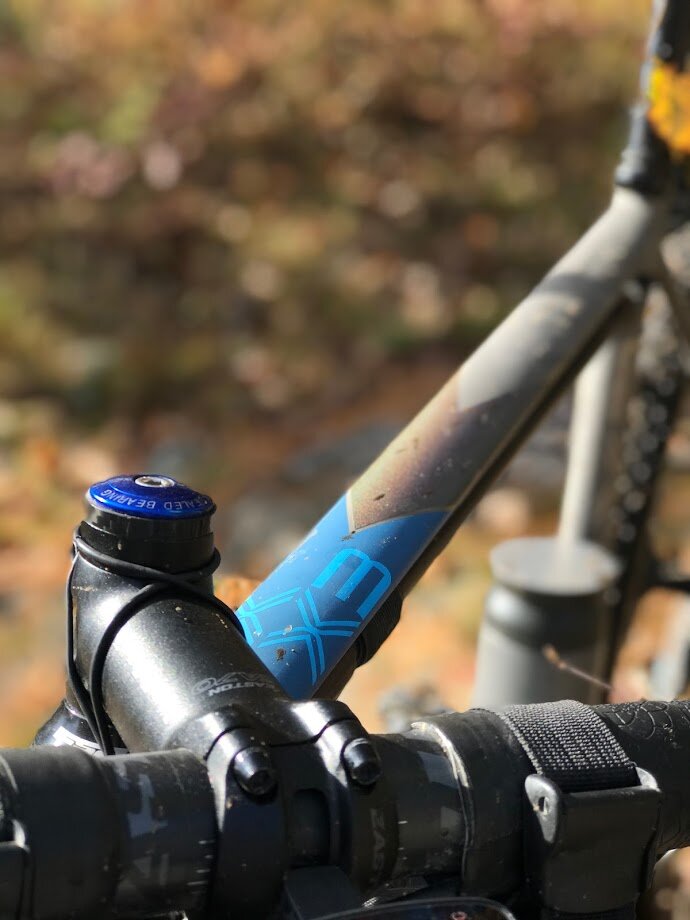
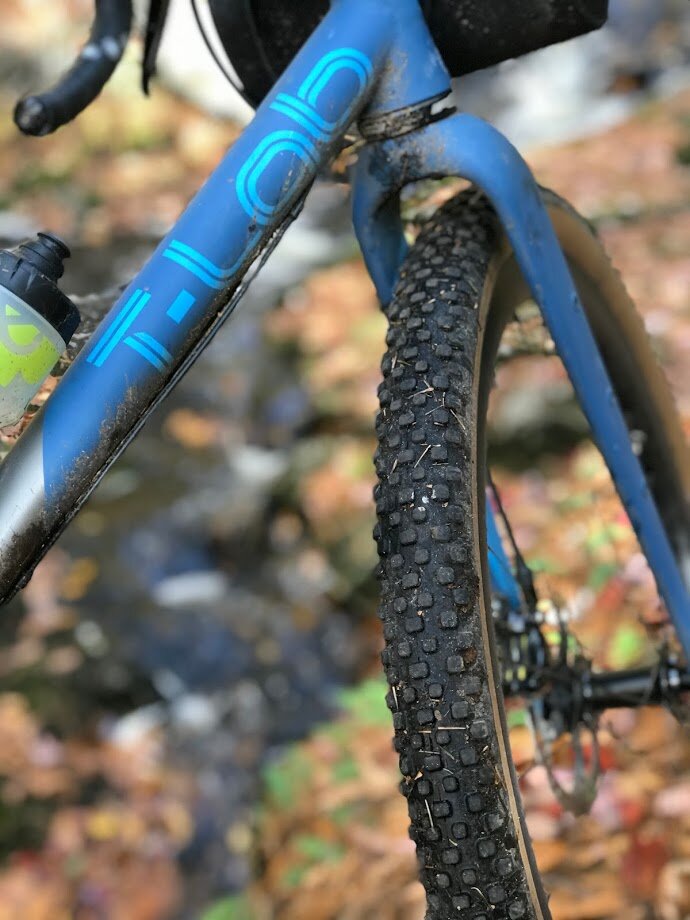
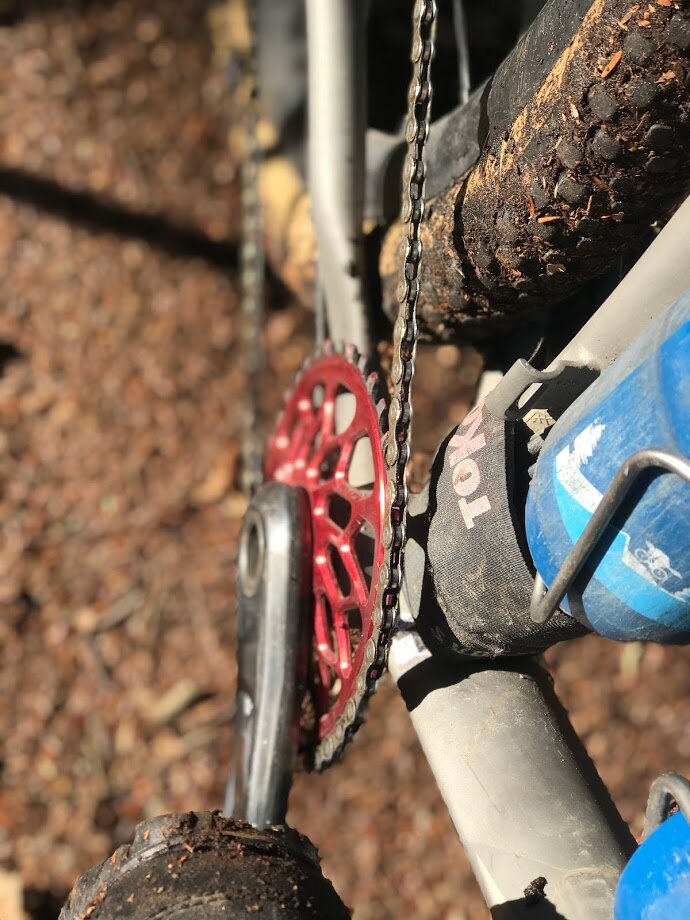
This element should be driven by careful assessment of prospective terrain. A lot of the riding I expected to do on my X3 would be suited to Rene Herse’s Juniper Ridge 650b x 48mm knobby tires, which I enjoy across a broad range of conditions. I didn’t have a mountain bike rolling when I started the T-Lab design, so I knew I’d use the X3 for trail riding around home (think about the ecosystem concept here). Ultimately, I imagined the bike might serve as a second cyclocross rig, but I wasn’t letting that drive any of its design elements. Also, I knew I like the slick Rene Herse Switchback Hill in 650b x 48mm, which would fit into the bike the same as the knobbies. If in wanted/needed to convert the bike to ‘all-road mode’, I would be able to do that seamlessly (a contingency if my all-road bike fell out of the ecosystem for some reason). I set up my carbon Brodie as an all-road bike that could fit tires as large as I’d ever want, given its layout: not miles from my road body position. In contrast, the X3 would be a drop-bar mountain bike, the sort of species one would align with dropbarbraap and dropgnar vibes. If my X3 were an animal, it’d be a wolverine.
With a cap - based on my experience - of about 2” max tire width, I wouldn’t be pushing any boundaries with regard to fork clearance, while chainstay clearance would be somewhat challenging. The X3 would be my 650b bike (unique species, dropbarbraapius), while my Brodie Romax carbon runs 700c wheels (species: allroadius). But keep in mind that 35mm tires (the bottom end of my all-road volume range) would have almost the same ride height as the 650s, which would make this not only a 650b bike, but one that could do both wheel diameters. If I’d planned to primarily ride Rene Herse’s Snoqualmie Pass tires - 700c x 44mm slicks - I’d probably have adjusted frame geometry to accommodate them, particularly its bottom bracket drop (and thus, ride height). I find the BIG 700c tires are best-suited to fast, wide open riding, which I prefer a more stretched out body position for, which is why I’d be unlikely to want to run that set-up on my X3 in its dropbarbrappius form. Swapping to such a tire setup would make sense with a couple other adaptations, which would amount to allopatric speciation; diverging from the species’ attributes and characteristics to fit and function in a different habitat.
Design Element: Gearing
I didn’t anticipate having to deal with epic climbs on the T-Lab, but I’d want to retain the ability to mount a front derailleur if I wanted/needed to (like for travelling to Europe). This of this as genetic diversity, in the form of DNA remnants that can be activated if required. My X3 would be for rides that combine pavement, dirt roads and trails. When I’d only be on paved and dirt roads (all-road), I’d ride the Romax allroadius. This preference for using a 1X for my X3 use-case is driven by a few factors:
1) doubles reduce chainring clearance over obstacles, a trail-riding factor;
2) doubles introduce problems associated with shifting, particularly off-road, along with extra shifting;
3) doubles are less reliable than single-rings for retaining the chain over rough terrain;
4) doubles introduce chain-jamming potential on frames where clearances to chainstays and downtubes are tight;
5) doubles tolerate contamination poorly compared to singles, which can lead to chainsuck and accelerated ring wear. For example, I use my double big ring 99% of the time on my allroadius, which is placed a little further outboard than a 1X ring would be, which translates into increased wear-rate, not least because the teeth are shallower and thinner to facilitate shifting.
While these downsides pushed me away from a double-ring spec, no single-ring system was available at the time that I considered viable for riding in mountains. I can’t say until I ride it, but I suspect Campagnolo’s new EKAR group marks a paradigm shift in this respect (read, evolution).
Note that your choice between 1X and 2X gearing can impact the tire and chainring clearance that gets worked into your frame’s design, as can your maximum chainring size. If, for example, you KNOW you’ll never want to run a ring larger than 46t on your bike (which is linked to max tire size you’d ever use), the builder will be able to design around that, and push tire clearance out more than if you specify 50t as your max ring. And, note that an oval 46t ring, like the Absolute Black rings I ride, will be ‘larger’ in terms of overall clearance required than a round one.
Design Element: Ride Quality & Compliance
It’s important to think of wheels and tires as dynamic elements within a bike’s overall design and ultimate feel, because these components will dominate the feedback you perceive as you ride. Literally, tires determine what your bike feels like more than anything else (taking fit as a constant). Wheels, foremost their depth, and secondarily, their weight and compliance, are next in line when it comes to feedback and ride quality. It often takes experiments at the limits to render these characteristics clear. For example, if you ride an 80mm deep front wheel in a mild cross-wind, then a 30mm one, back to back, you’ll immediately discern the difference. Wheel depth can be used to tune handling, which ought to relate to both terrain ridden, and even time of year; spring is far windier than summer in my region, for example.
Compliance was part of my X3 priority-set. I chose to build the bike with 650b x 48mm tires in mind in the context of what I anticipated would not be the stiffest frame I ride. And make no mistake; I didn’t want it to be the stiffest frame I ride! 650b x 48mm tires provide what I consider to be a perfect balance of high-speed stability, comfort, and nimble handling for mixed surface riding on the dropgnar end of the spectrum. They provide a degree of ‘snappiness’ that interacts with frame and fork stiffness. So, if my frame came out ‘less sharp’ in terms of handling compared to my carbon Brodie Romax (stiffest bike I own, in part because it is built to carry load), the smaller wheels would keep me in the overall range of responsiveness I want, while increasing the traction and comfort I’d get out of the frame’s resilience. This is an example of the complexity I mention above. If I was to take my X3 on a very long and perhaps less technical ride, I could mount my 700c x 44mm slick-tire setup (Rene Herse Snoqualmie Pass). Handling would be muted, but for long rides sharp handling isn’t generally a priority, especially when deploying the now-UCI-banned ghost-aero arm position, which I’d need to use, since the bike’s reach would be shorter than I run for all-road.
(2) the bike for ‘just riding,’ ‘racing,’ something in between, or both?

I didn’t approach the T-Lab build with the intention of it being a race bike. I figured I might race it here and there; my body position on the bike would determine whether it was appropriate for a given event perhaps as much as its gearing. For example, if there was something akin to an enduro cyclocross race to do, with lots of technical riding and not much high speed, the bike would be an easy pick.
When thinking about riding versus racing, duration needs to be considered. If you’re reading this while dabbling with the idea of building a custom road bike for racing, you’ll have the easiest time landing on reliable geometry, since all good road bikes already handle a broad range of use-cases; you can can copy them. In a certain sense, pavement is pavement. But in the gravel domain, amorphous as it is, races range wildly in length and duration, from around an hour to weeks. The thing to keep in mind is that bike design is always a game of trade-offs. A pro cyclocross bike is designed to be raced at extremely high intensity and power output for about an hour. When you’re pushing hard on the pedals you don’t have all your weight on the saddle. This means a fairly stiff bike, ridden with very low tire pressure, will feel ‘normal’ and ‘good’. The same bike, with harder tires, ridden for 6 hours, could easily feel punishing, because seated time would be greater, and power output would be lower. Over a given minute, more vibration and shock would be absorbed by the body.
If you’re thinking about a bike for racing, you might want to give up a little ‘responsiveness,’ which is at a premium over short durations, for increased comfort over longer durations, which equates to energy savings and higher sustained speeds.
Given I knew I’d likely wind up mounting a frame bag to the bike, and I’d probably use it for some cyclocross, I didn’t want to drop my top-tube so low as to cramp the front triangle, and too low to comfortably reach when dismounted. A low top-tube looks cool, very much an MTB vibe, but these are considerations one should assess.
(3) Is there a favoured geometry that can be used as a starting point?

It’s generally good to start your geometry exploration with a baseline: a bike you’re riding that you love or at least like. Bearing in mind that riders adapt to whatever they’re riding, regardless of whether they’re ‘right,’ one’s baseline needs to be taken with a grain of salt. On the flip-side, many of the folks I’ve consulted on geometry for all-road and gravel bikes over the last few years have not had any baseline in these categories. In these cases, all there really is to work with is body-fit on the bike. For example, if a rider has been enjoying a fairly aggressive - long and low - road position on a typical road bike, they will tend to not want to replicate this position on an all-road or gravel bike unless the bike is intended as a race bike. Even in that case, if racing will involve off-road sectors, the forward weight-bias of a road bike would be inappropriate. Thus, even in the case of retaining the most ‘stretched out’ position, I’d recommend shifting the rider’s weight distribution back around 2cm. This increases stability on loose surfaces at speed, and reduces the OTB (over-the-bars) factor when descending steep terrain.
Design Element: Steering (Forks)
If you’re new to gravel and all-road riding, you might not yet have a sense of what sort of steering characteristics you prefer when straying from pavement. Some folks will lean toward the relatively ‘sharp’ handling feel of road bikes without realizing that most of that comes from tire size. To dig into to the details of front end geometry, I suggest you read through my piece on gravel geometry.
As a rider who can feel minute differences between bikes, I admit it’s very difficult for me to discern differences between rigid forks on the drop-bar bikes I’ve ridden over the last few years. I run the same wheels and tires across multiple bikes, so they are effectively ‘controls.’ I think the truth of the matter must be that all the forks I’ve been riding, at least since switching to disc brakes, have fallen within a fairly narrow range of flex characteristics. I can definitely feel the difference when comparing my old Enve canti-brake cyclocross fork against my disc brake forks, but not between the disc forks. Thus, in the context of designing geometry, I think flex/travel is too fine-grained to factor, and should thus be considered as a comfort parameter.

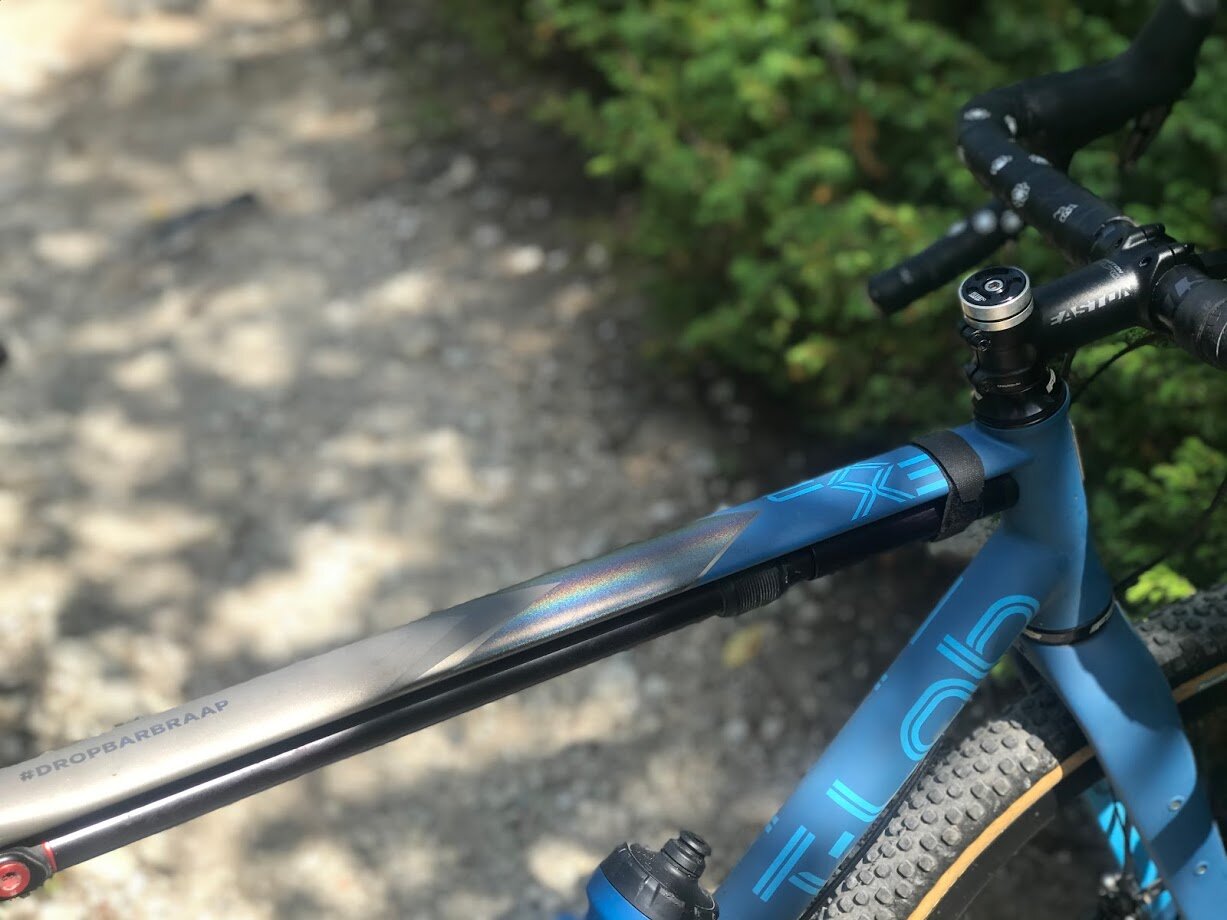
The Columbus Futura Cross fork, at 47mm rake.
If you’re thinking you’ll want to use custom bike for bikepacking, keep in mind that builders are likely to increase the frame and fork’s stiffness to retain stability when you ride with load attached to the bike. This is why touring bikes are really stiff; the bike needs to resist twisting vertically as you descend and attempt to turn. No builder wants customers terrified to descend on their bikes, so they will vie toward increased tube diameter and/or wall thickness to provide lateral stiffness. Similar moves will be undertaken when custom forks are built, but most custom bikes these days will be built with a specific production carbon fork specification.
Forks with fittings along their legs for mounting gear are built more robustly than those without; at least the higher-end ones are. For example, Columbus builds their Futura Cross fork in two variants: with and without mounts. Without mounts, the fork is designed and constructed to strike what they consider to the optimal balance of compliance, braking stability, and handling precision. Compliance is something we definitely want as much as we can get on a rigid bike for all-terrain riding, but not at the expense of handling. Thus, for their Future Cross+ fork, which incorporates fittings for mounting gear, Columbus shifts priority toward extra strength and steering precision when all sorts of weight is attached to each leg. So if you want to ensure the greatest degree of comfort, choose a fork without extra mounts. Will you feel the difference? Maybe not; I haven’t.
Returning to the frame, if you want to leave the door open for some bikepacking, the X3’s flattened top-tube is nice, because it absorbs some of the energy transmitted from the front wheel more than a round tube of the same weight would. This takes some of the edge off the extra energy a stiffer fork will transmit, rendering this option a little less ‘risky’ in terms of overall ride quality.
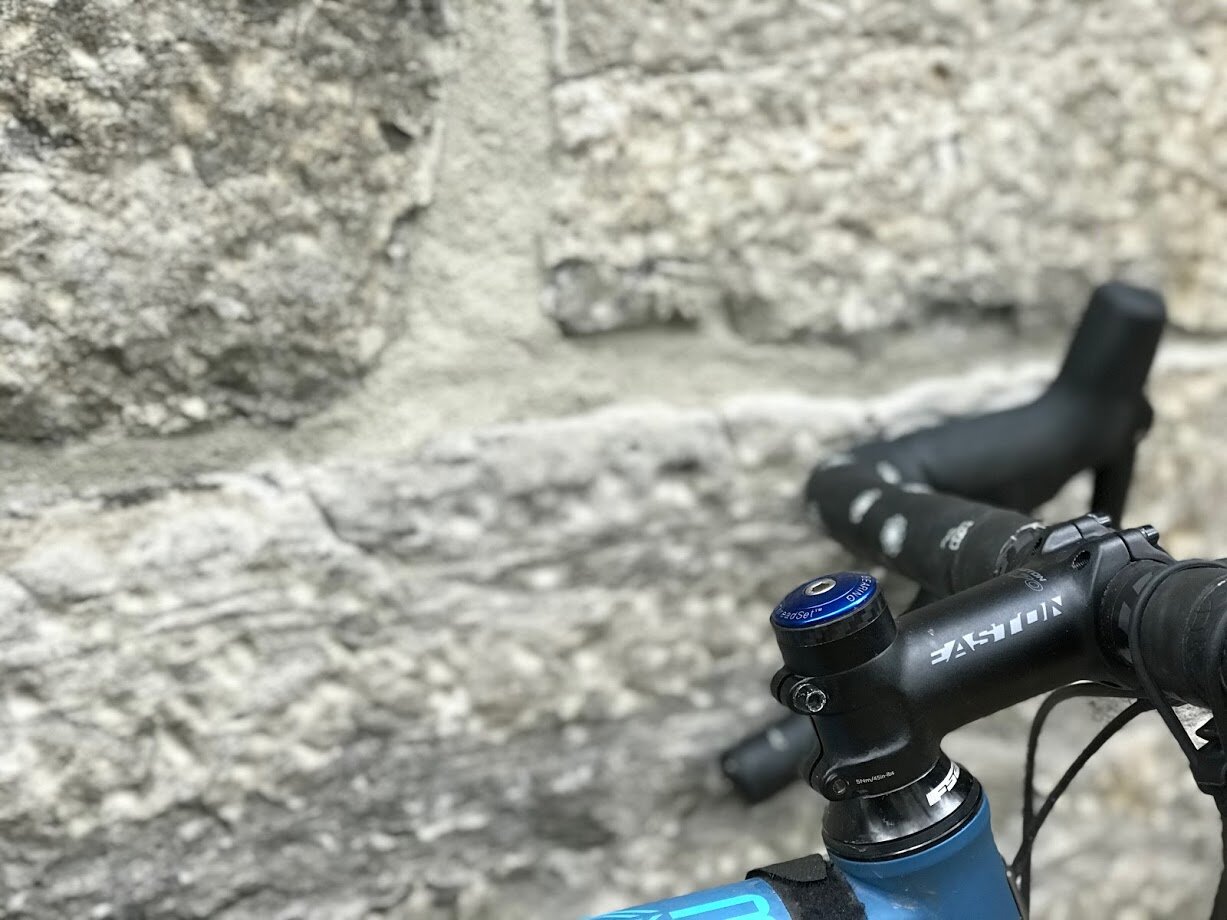
I would argue the most important aspect of fork choice (between quality options) is geometry. There are some gravel forks out there with weird rake, like the Rodeo Spork, for example. I am all about options, so I lean heavily toward Columbus’s options with adjustable rake. This is something I’ve written about for years, and I’m happy to report that Columbus has executed this concept really well. I have a test fork they’ve provided mounted to my T-Lab, and it is impressively well-made. It provides two rake positions, which can really help tune the handling characteristics you’re after, across wheel and tire set-ups.
Circling back to the previous section, stem length bears on steering, naturally. The longer the stem, the more flex at the bars, which will play into the overall feel of the front end. Meaning, stem length is implicated in how you think your front end is flexing. Similarly, a variety of handlebars offer compliance, and can be selected to tune the ride quality you want from your bike. Again, each variable affects others, so if you choose the most compliant frame, with most compliant wheels and tires, fork, and bars, your overall feel will be muted. This will be optimal for conserving energy over long hours of rough terrain, but won’t feel ‘fast and sporty’ in the parking lot. It’s a game of compromises.
Design Element: Sitting
I use the same saddles and seat-posts on various bikes, so that’s controlled-for too. I know how a variety of front-end geometries handle with a broad range of 700c and 650b wheels and tires, and I know what bottom-bracket drop works well for me across that range, along with the chainstay length that strikes a good balance of costs and benefits. I know how I want to fit on the bike, so I can look at the ‘back’ of the bike as locked-in (same hip position as on my other bikes). In my mind, this constitutes a significant proportion of a bike’s DNA, and drives
When evaluating geometry it’s important to try to decouple it from the rest of the ensemble: frame materials, components, fit. With my T-Lab build I wanted to validate a couple theories, but couldn’t exactly decouple two key elements in one go: geometry and material. Meaning, while I’d ridden a bunch on the demo X3 and had a sense of the material’s feel, it had a slightly odd geometry, which threw a wildcard into the mix, making it hard to judge the material on its own merits.
Your desired seated position might be ‘fixed’, if you prefer to have your hips in the same place no matter what sort of bike you’re riding. If you’re more open to variance, there are a few reasons you might wish to move your hips back or forward in relation to your road position, for example.
Most riders will want a less aggressive position for an all-road or gravel bike, much closer to that of a cyclocross bike. For this I also tend to bias the hips back a bit (with an offset seatpost) for the pedaling position, which helps maintain traction while seated. To keep the weight bias back while standing, the front end has to get proportionally longer, which can be achieved by extending the top-tube and shortening the stem. As you can gather, these sorts of changes equate to ‘leaps of faith’ for many riders. However, I can attest that everyone I know who’s committed to the ‘modern geo’ approach - longer front end, shorter stem - has been happy with the result. One of the great bonuses with this format is that a short stem provides an excellent ‘rough stuff’ position (for me, same reach as a cyclocross bike), while installing a longer stem can transform the bike into a long-hauler (and cross over into the all-road domain) with a more aerodynamic position. I literally cannot achieve a ‘modern gravel position’ on my cyclocross bikes, which run ‘conventional’ top-tube lengths, because there are limits to how far I can move my saddle back. And on this facet, I’ll add that a more rearward - than road - saddle position, when coupled with a mid to low handlebar drop, will work best with cranks that preserve a reasonably hip-angle. For me, while I can ride 175mm cranks comfortably on mountain bikes, I prefer 172.5 for my drop-bar bikes. I feel this strikes a nice balance of hip-angle and ride height across my various platforms. If I built a fast set-up for all-road with 650b x 42mm tires, I’d run 170mm cranks.
Cyclocross bikes work well with a slightly rearward hip position. This biases weight to the rear wheel a bit, and increases traction while climbing slippery terrain in the saddle. If you move your saddle back 1cm on a CX bike (versus your road position), you can also shorten your stem 1cm to preserve your ‘standard reach.’ This alone would make the bike easier to maneuver, including bunny-hop. Realistically, if one were adapting a frame that could ‘do it all’ from a road position to a CX one, the stem length would decrease closer to 4cm. Moving the saddle back allows for a rather different approach to positioning the body over the wheels. This CX example maps nicely onto a set-up for trail riding on a drop bar bike too, for all the same reasons.
A more ‘all-road’ oriented layout would likely start from a saddle position identical to a road bike. This creates the most ‘forward’ weight bias, which makes creating aero positions with the arms as comfortable as you’re going to get, provided your bars are positioned well. Meaning, your hip-angle will be more open as you drop your shoulders and make your forearms level with the ground than if your hips are positioned further back. So this element very much comes down to how you’re going to ride the bike. My X3 was to be set up for lots of rough riding, and not any long hauls on pavement, but I wanted to preserve the flexibility to set it up for either style of riding. As it turned out, I believe there’s no downside to the geometry I landed on.
For the most drop-bar-MTB-style riding, a dropper seatpost might be desirable. This is actually a rather important design element, if you look at it holistically. Drop bar MTBs, such as those made by Matt Chester, have typically needed to have the drop/hook hand position placed high relative to a road bike or CX bike, because this position was necessary for stability on descents, and any hope of acceptable braking power. Before hydraulic disc brakes, it was difficult to brake hard enough off-road from the hoods, and they tended to be shaped such that it wasn’t uncommon to have the hands blown off under high impact loads. Hydraulic disc brakes have changed the equation in terms of bar position, which has certainly played a role in gravel bikes becoming ‘real.’ Previously, riding the drops for the most technical and scary descents was fairly terrible, because this biased weight to the front wheel too much, which can lead to various crash-related problems. If one were to compensate by raising the bars, the ‘gravel bike’ or drop bar MTB would wind up having one useful hand position - the drops - which renders the bike a lame mountain bike, IMO. MTBs have one hand position too, and it’s way better for off-road than drops.
A dropper post changes the equation, because it allows the rider to run a ‘normal’ or ‘versatile’ bar shape and position, which offers multiple useful hand positions, AND renders the drops useful for gnarly descents too. By dropping the post, the hips lower, maintaining a more typical hip-hands height differential, compared to holding the hoods. For example, if your drops position your hands 80mm lower than your hoods, and your dropper allows your hips to lower 80mm, you’ve dropped your centre of mass 80mm without compromising your ability to move around your saddle. This is a big deal in terms of overall range of motion and stability. This all means that if you want a really polyvalent set-up, you might want to run more saddle-bar drop than you’d want for a CX bike, enabling a more aero road position, and rely on a dropper post to provide a safer capability when handling technical terrain, or even really fast descents (UCI compliant!). Yet again, each element is part of a dynamic system.
If you opt to incorporate a dropper, internal cable routing would be wise to work into your design, not least because externally-routed posts are increasingly uncommon, and wireless droppers don’t exist in 27.2mm at the time of this writing. 27.2 is the most common size post used for drop-bar bikes these days, at least when round, which is necessary for an off-the shelf dropper anyhow. Easton makes a 27.2mm option with 50mm travel, the EA70 AX. In an ideal world, one could use a wireless 27.2 dropper when required, and a regular post when not, thus saving weight, wear and tear, and likelihood of a mid-ride technical issue. We’re not there yet, so a dropper is a significant commitment at the moment, with regard to cost, installation time, and lack of simple modularity.
If you’re weighing the merits of designing a gravel bike ‘around’ using a dropper, keep in mind that an XC mountain bike will overlap such a bike’s use-range, rendering it less ‘necessary’ than you might imagine, and, droppers require maintenance and are far from reliable under regular riding. This is true for all brands; it’s a hard product to produce at costs folks are willing to pay and deliver hundreds of hours of performance without issues. So if you’re committing to a dropper, you might want to get your head around accepting that you’ll have to maintain the post regularly, or replace it way sooner than feels reasonable if you don’t. If you wind up feeling burned by your dropper post experience, you probably don’t want that burn to extend to your bike’s future fun-factor. Meaning, if you build the bike with a very short head-tube, slam your stem, run some sort of one-piece bar/stem combo that costs $1k, then swear off droppers and find your drops too low to use on steep descents, you’re going to be pretty locked-in. Try to think it through, and avoid painting yourself into a corner. Remember, Formula 1-level tech needs to be maintained to Formula 1 standards.


What’s Next?
You’ve made it this far, congratulations! I know, that was a LOT, but that’s why you come here, right‽
In the next installment I’ll cover the EXECUTION phase of my design process; the build. This piece will detail how each theoretical dimension I discuss above was put into practice, right down to the nitty-gritty (as you’d expect!).
In the third and final part, I’ll cover IMPLEMENTATION, which is just a technical way of saying ‘RIDING!” This piece will cover my time on the bike over the last year or so, and how my decisions played out. The really cool aspect I’ll get into will be how introducing a new hardtail MTB into my personal bike ecosystem influenced my X3’s life. Until then, you can catch up on and follow X3 action over on my Instagram grid and stories.