
Field Notes: The ‘Secret Gravel Stelvio’
Scene-Setter
THE GRAVEL STELVIO IS NOT APPROPRIATE FOR EVERYBODY WHO CAN SWING A LEG OVER A GRAVEL BIKE.
This post was inspired by the mismatch between perception of the gravel Stelvio route - also referred to as ‘the fourth way’ - based on a popular summer 2025 GCN video, and the actual experience of riding it. This is at once a cautionary tale and a valorization of the route. The last thing I or anyone would want is for a novice gravel rider to take on the route and fall off a cliff.

Waiting to pass cows on singletrack: a first for me. This is toward the end of the route, the mellow part.
Background
Let me begin by saying the gravel Stelvio ride we did will go down as one of the best and most rewarding riding experiences of my 30+ years riding bikes like a maniac. It felt EPIC despite involving exactly zero drama. There was a LOT that could have gone very, very wrong, and none of that occurred mainly because we had a lot of relevant riding experience to draw from, including mountain biking. The ride demanded hours of being locked in, focused, and precise. As experienced riders, that was not unusual, but it was noteworthy. The route ended up being far more technical than expected, exceeding the impression we got from the GCN video we based the ride on.
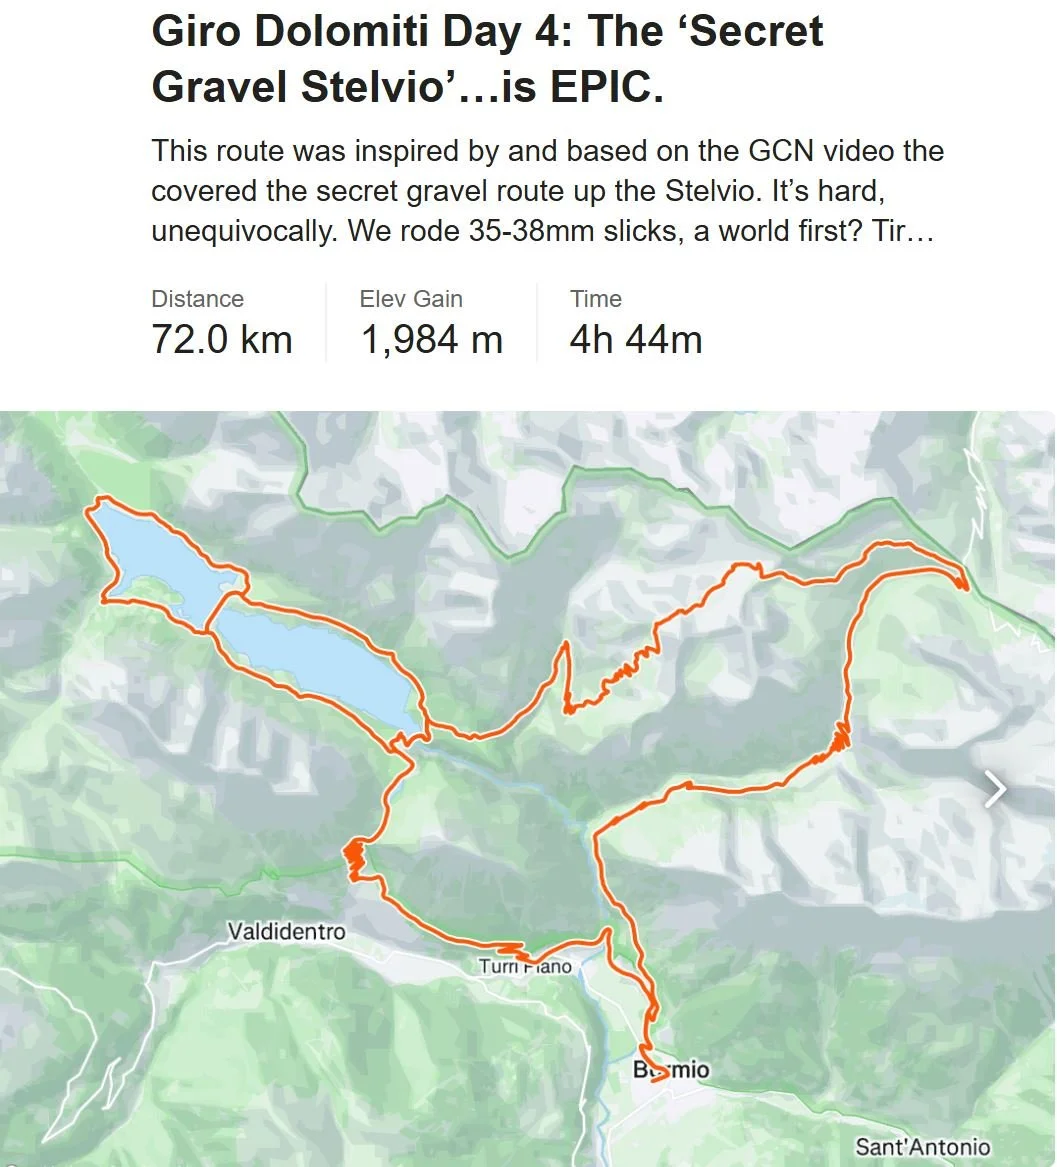
‘The Secret Ascent of the Stelvio is Peak Gravel’ video landed as we were shaping itinerary; we’d be in Bormio for a few days, and the Passo Stelvio, Passo Gavia, and Passo Mortirolo were all on our to-do list. We decided to add the (‘secret’) gravel alternative to the iconic paved pass to the list.
Early in our trip planning we agreed to run 700c x 35-38mm tires (without knobs) to match our intention to bias toward paved roads as we plotted our course from Venice to Trento, Bormio, Canazei, then back to Venice. Out of 14 days we’d have two spent on planes, 11 on bikes, and one for decompression in Venice. The idea was to transfer from accommodation to accommodation not so much in ‘mission mode’, but ‘good ride mode.’ That means not pushing overkill tires when fully loaded for the sake of one dedicated gravel ride, but instead managing ‘normal’ tires for that ride. Given our extensive experience underbiking (riding dropbar bikes offroad for years before ‘gravel bikes’ existed), we were confident in our ability to make the gravel Stelvio work with our setups. And given my experience as a mechanic, I wasn’t overly concerned about mechanicals.
On September 7, 2025, Todd, Scott and I rode the route based on Oliver Bridgewood’s. The following day, when we stopped in at the Stelvio Experience shop, the owner confirmed exactly what we’d felt on the ride: lots of riders see the GCN video and come asking for it, but many absolutely should not attempt it.
Historical & Landscape Context
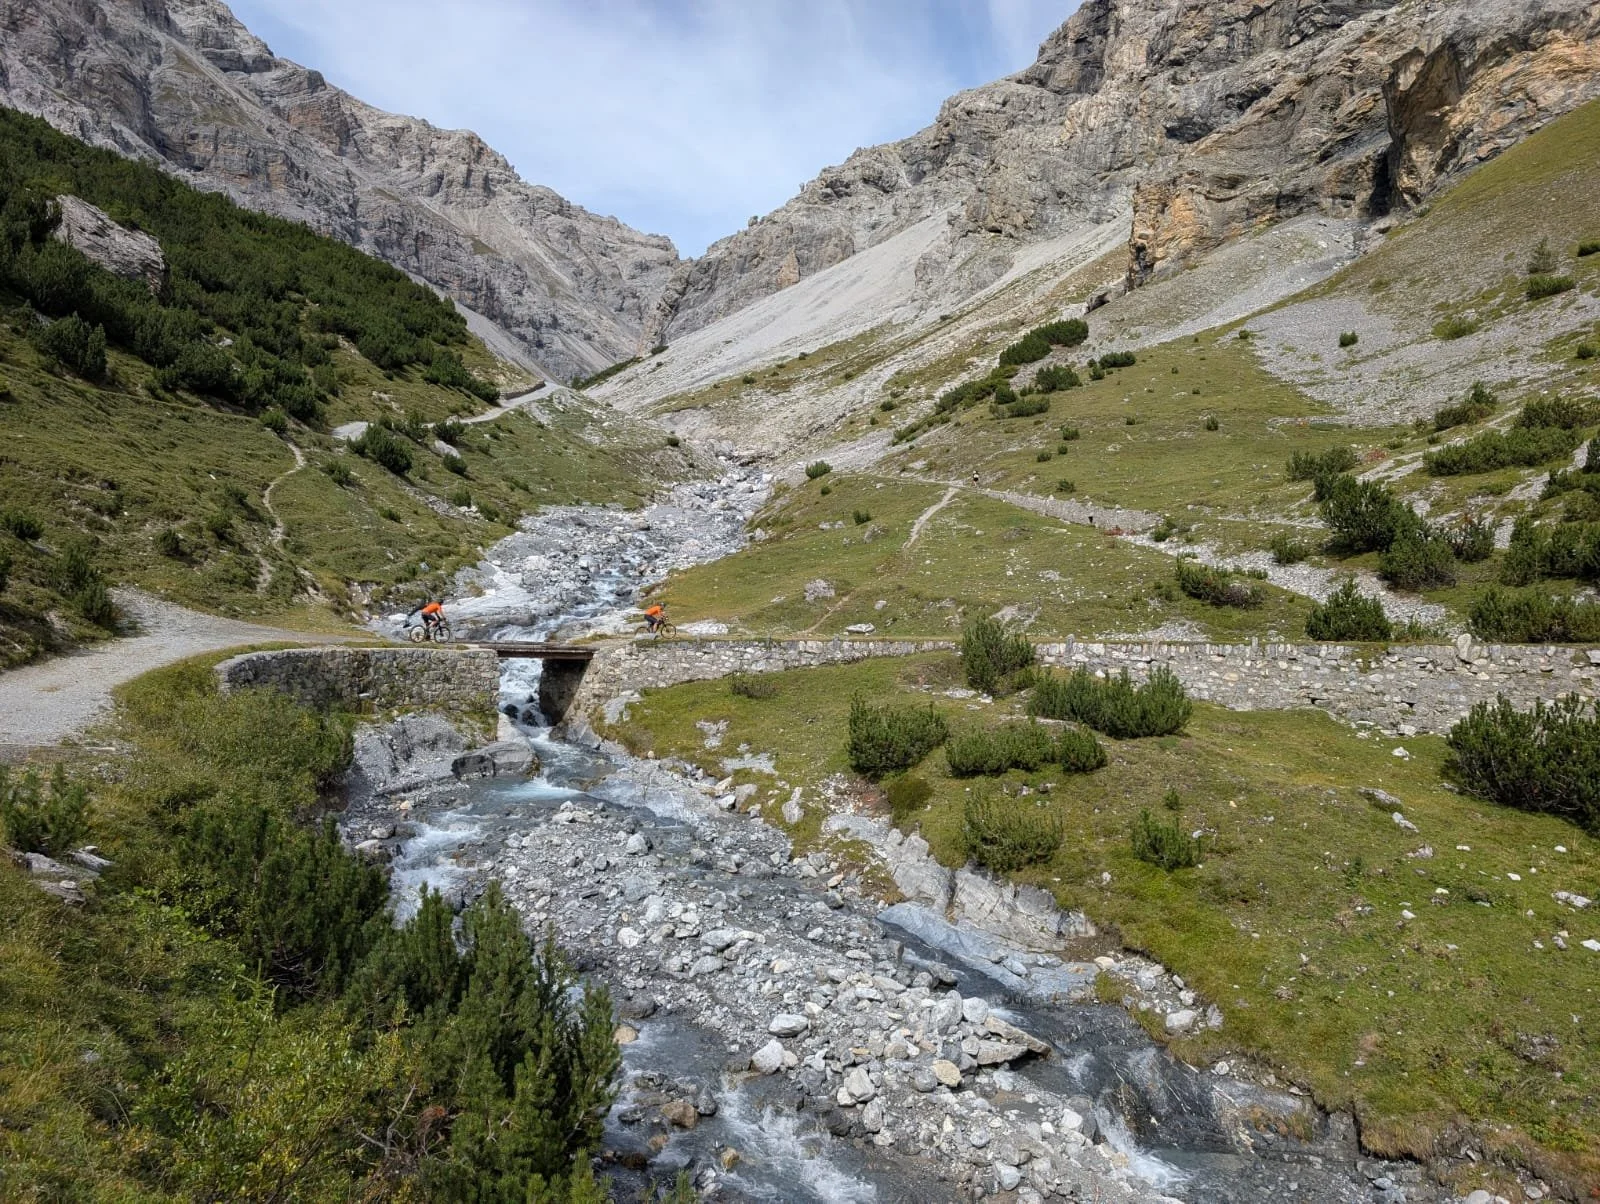
This gravel route traces the ancient Via del Sale, an old salt and wine trade route predating the paved Stelvio road and carrying weighty wartime history, including WWI trenches and fortifications embedded in the mountainside.
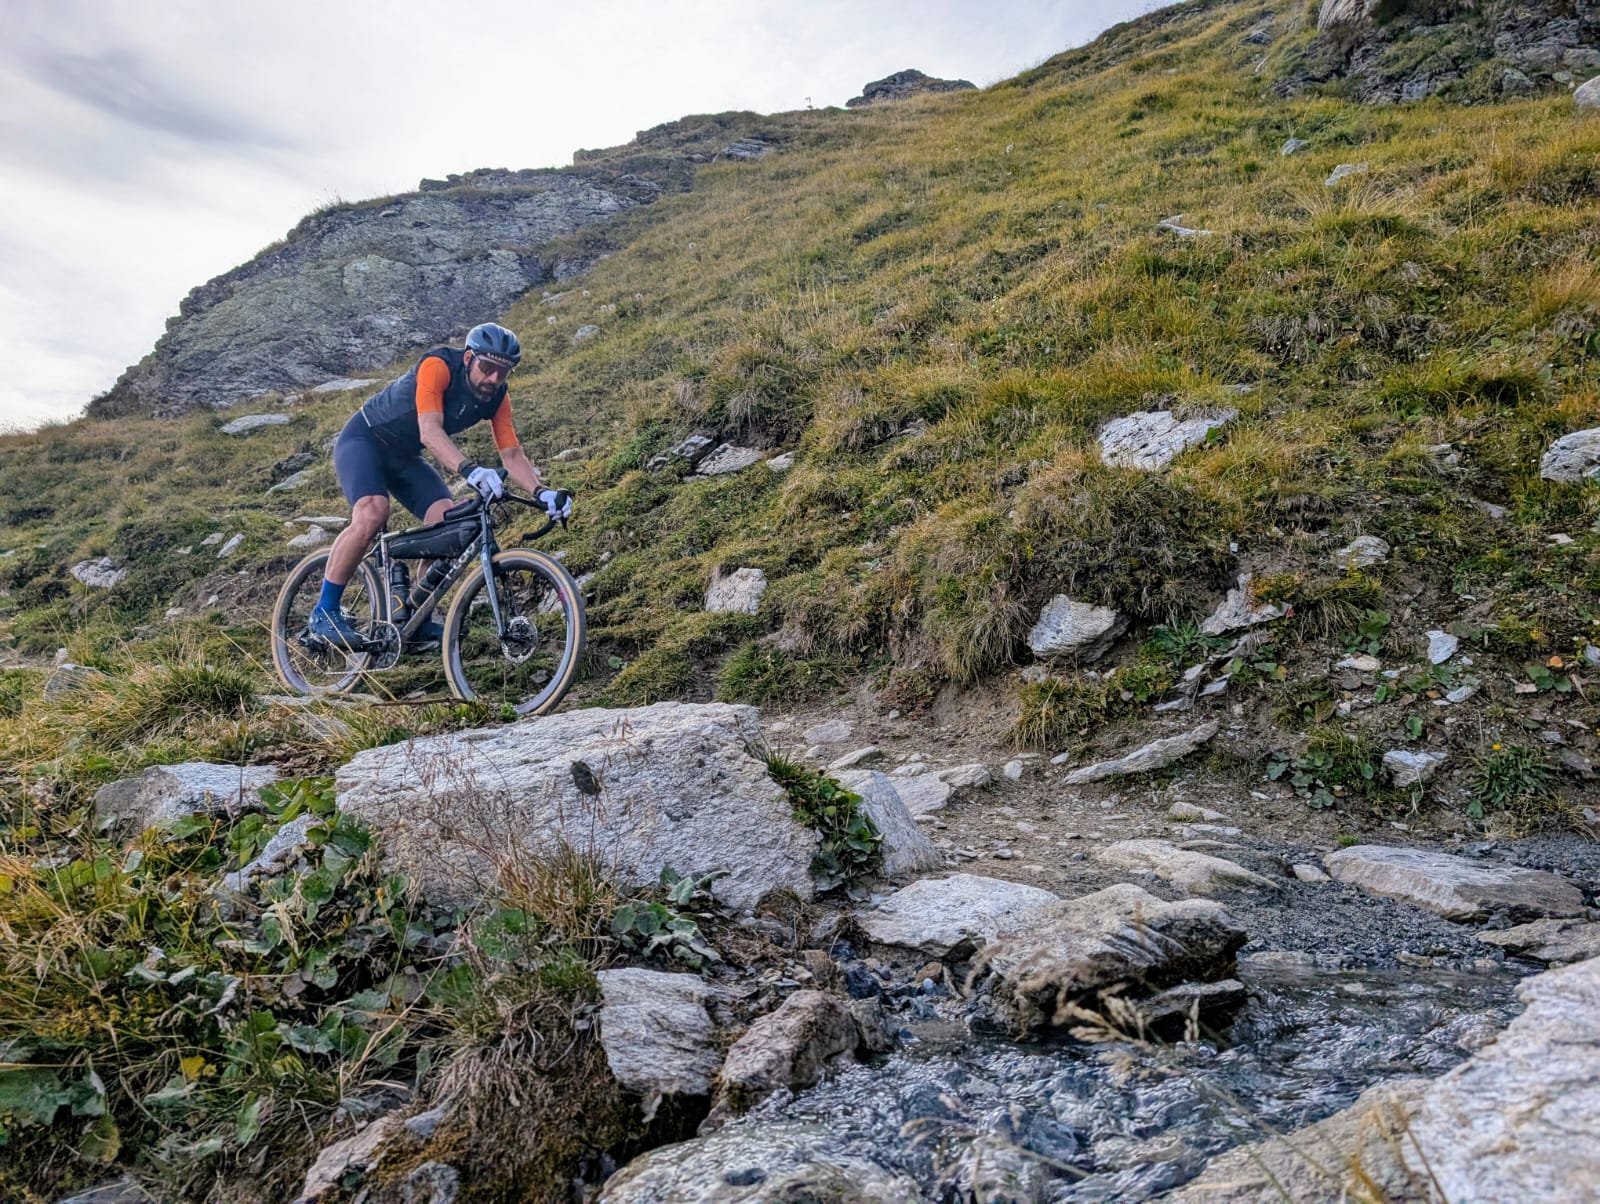
As a singletrack-dominant ascent, it starts north of Bormio and climbs relentlessly through forests and alpine cliffs on loose, uneven terrain.
Expect sustained gradients, loose gravel, exposure above the treeline, and no services. It's a remote, high-alpine, high-stakes environment.
You get a sense of the exposure here.
What It Actually Is
Forget the idea of a mellow gravel route that is ‘just hard climbing’. The most relevant metric is time spent on ‘easy’ versus ‘hard’ road/trail. In terms of time, the route is mostly singletrack, clinging to the mountain with loose surfaces, drainage cuts, and exposure. It’s overwhelmingly slow-moving, and very much an alpine path rather than a ‘gravel road’. Tires struggle to find traction over loose surfaces more than they need to contend with embedded sharp rock. There is one section of potential wide-open fast descending that can be ridden carefully with meager tires; the bulk of descending occurs on singletrack at moderate speed. A couple features on the way down should be walked: a rock section that would be hard on MTB, and series of stacked switchbacks that most folks (including me) would not want to ride on a MTB, let alone drop bar bike. It was dicey to even walk down. The singletrack outputs you to the paved road near the Umbrail Pass junction. Olly’s video has him going up for an extended bit of gravel we didn’t do. If you scour Strava you’ll see there’s a way to loop north to complete a route off-road; I imagine most folks would be wise to descend on the paved road (you’ll see a who’s who of pro cyclocross and MTB riders on the Strava segment leader boards).
Surface: unpredictable, not maintained for bikes
Distance: we ascended over 14km from the lake; the decent to the paved road is about 4km
Gradient: full Stelvio numbers - long, steep, unrelenting. The climbing tops out at 2,757m elevation
Traction: loose, tight switchbacks
Exposure: a mistake can have serious consequences
I really appreciated the control I got from the 180mm rotors I installed for the trip.
Who It’s For
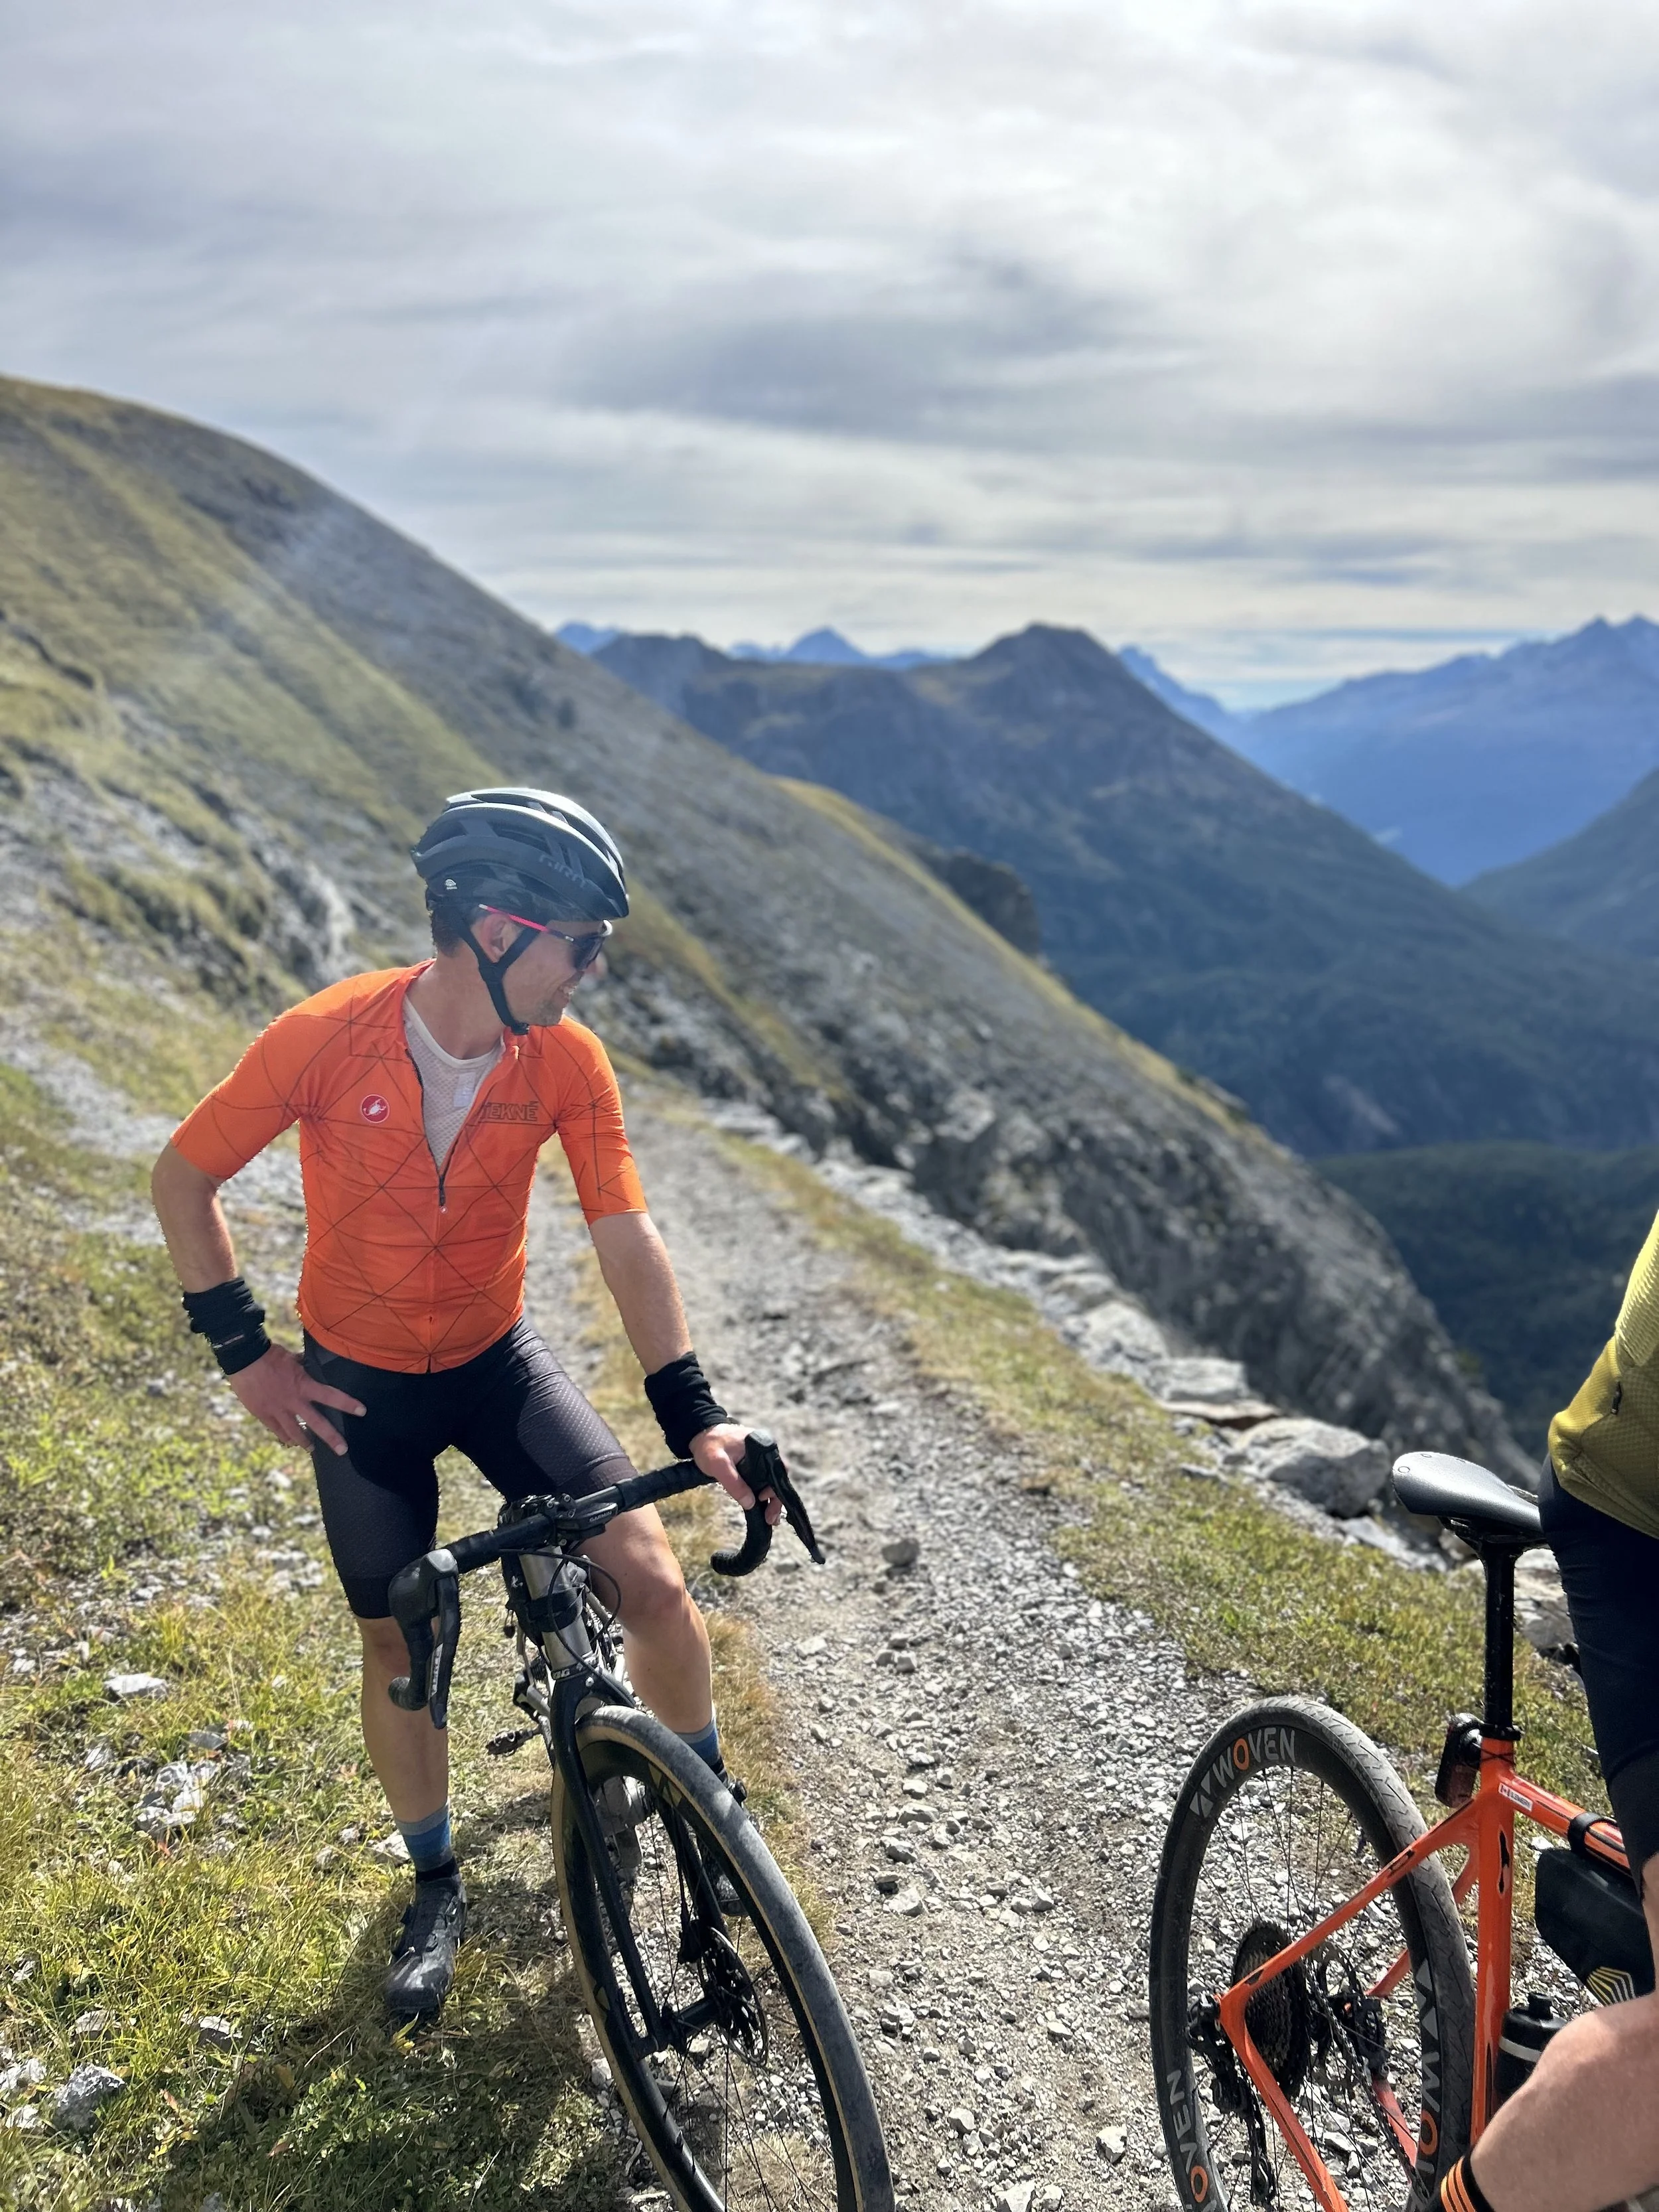
I rode an all-road bike, and with my background (DH, XC, CX, gravel, fatbike), I found it challenging; that’s the benchmark. For riders on gravel bikes without strong technical handling, this is not just ‘a bit sketchy.’ It’s hike-a-bike territory, with real safety concerns if folks push to ride outside their skill level.

Why the label is a Problem
The name ‘gravel Stelvio’ makes it sound like a cool detour; the reality is closer to technical alpine singletrack. Video edits show just enough of the fun bits to draw people in, without showing the consequences of being under-skilled or under-equipped. The local shop experiences the consequences: disappointed or even endangered riders who thought they were getting a scenic gravel climb. This reminds me of the time I rode DH at Mt Snow in 1995: a couple women with rental bikes were walking down the mountain covered in blood and crying after the rental guy told them they’d be ‘totally fine’ riding DH with zero MTB experience.
To be clear, there is absolutely nothing wrong with the route itself; it’s fantastic. It’s important for riders to understand what they’re getting into before making an attempt, and this post is intended to supplement videos that don’t provide a clear sense of difficulty and risk.

The ride around the lakes before taking on the Stelvio ascent is beautiful; we stopped at the restaurant for Todd to take a nap.
Guidance
If you’re considering it:
Be brutally honest about your skill level. This isn’t an experiment ground.
Choose the right bike. Ideal: MTB. Minimum: 42 mm knobby gravel tires. All-road bikes turn it into survival riding (keep in mind pro racers are riding this on MTBs more than dropbar bikes).
Respect the exposure. Treat it like an alpine trail, not a gravel road.
Don’t trust the edit. YouTube didn’t show you the whole story.
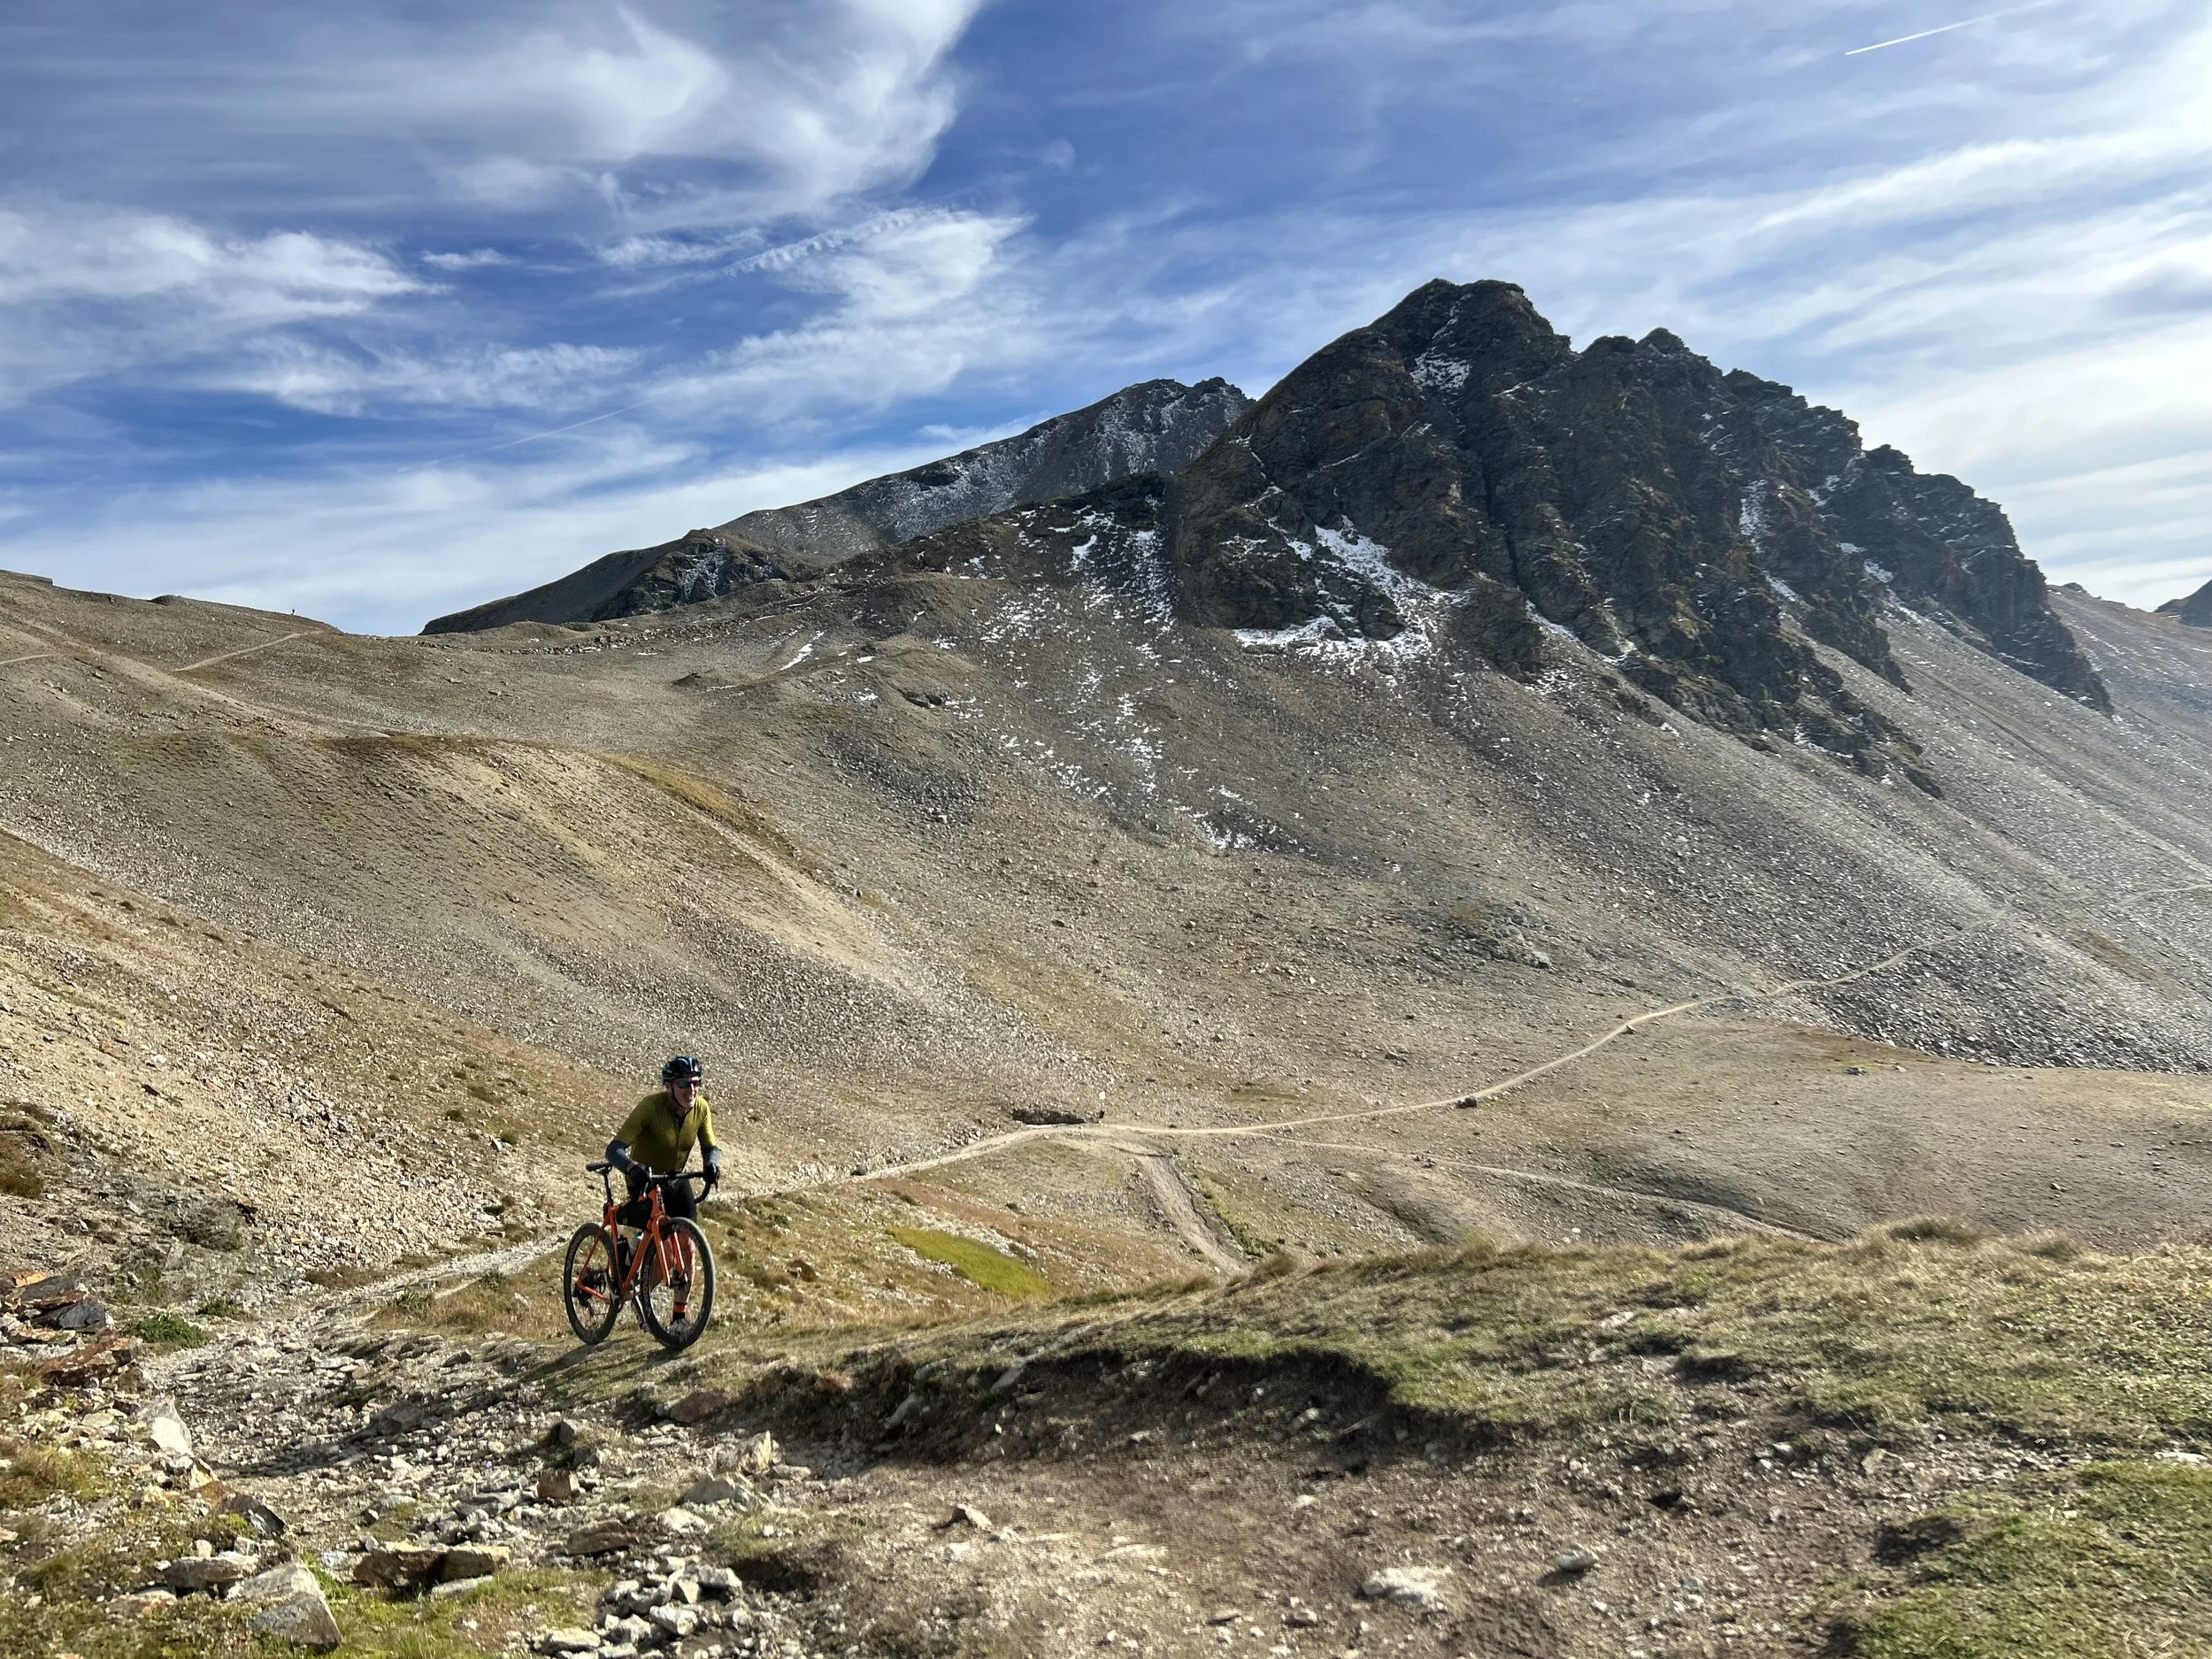
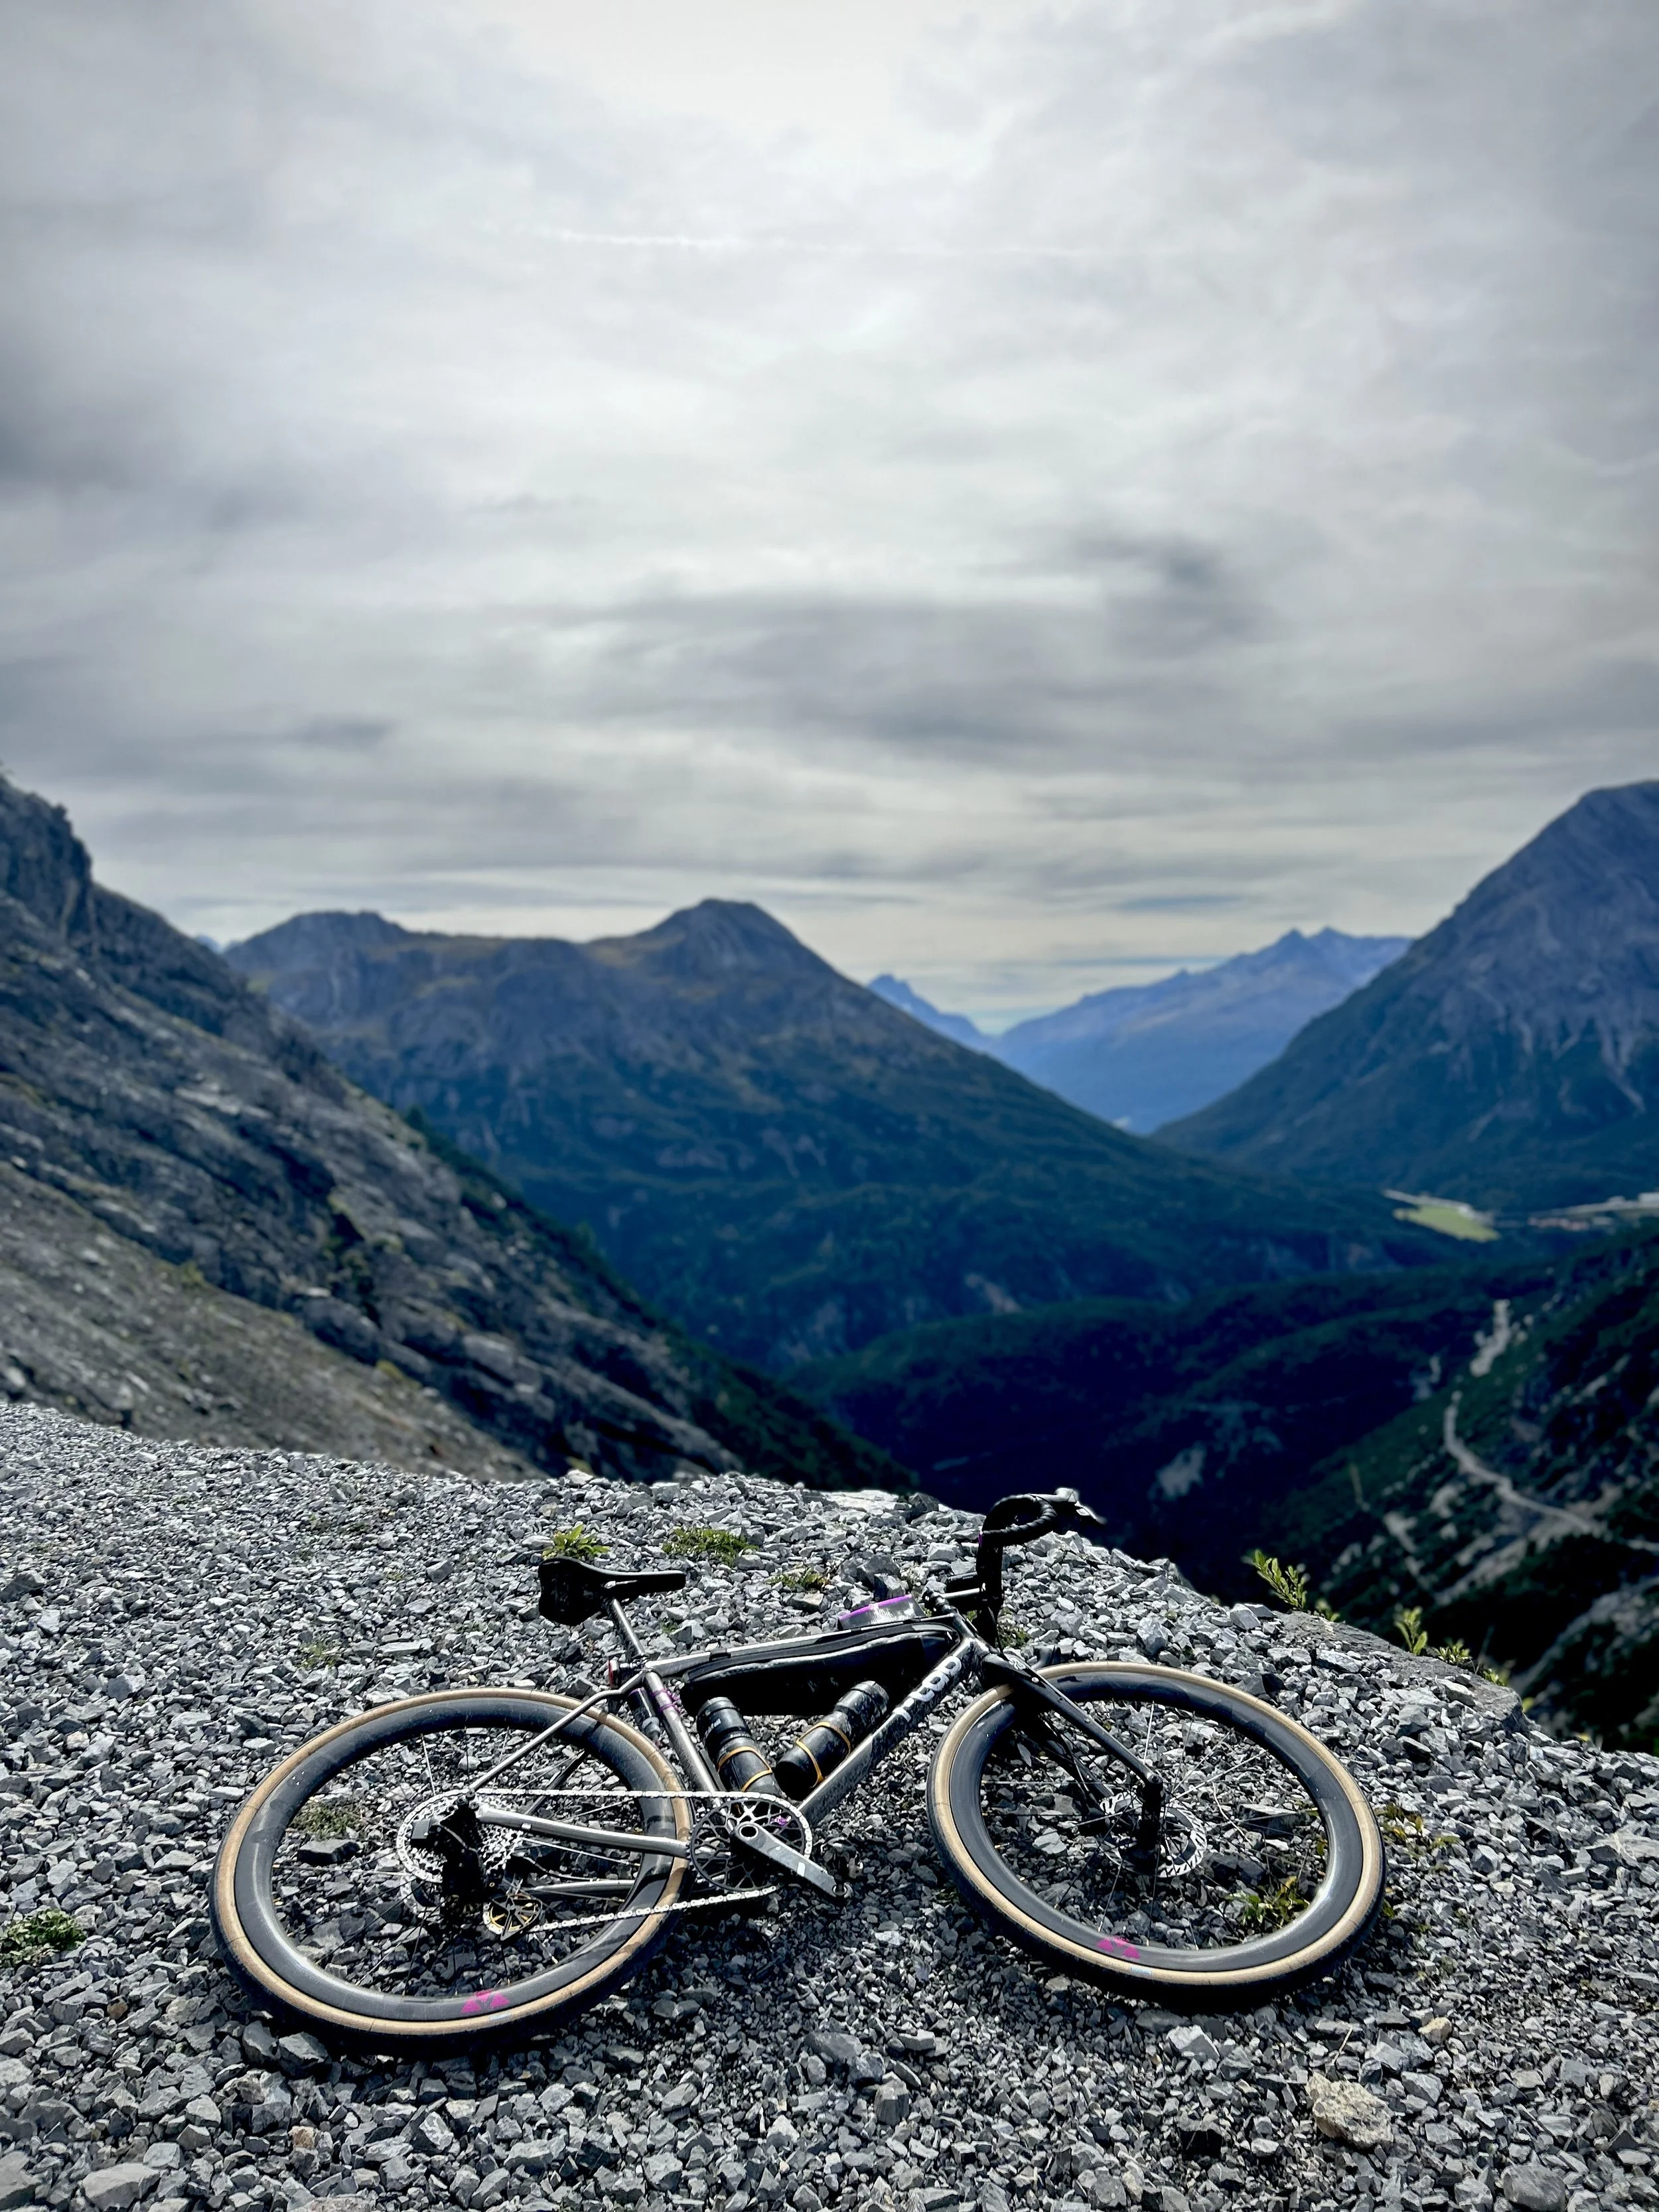
The landscape is spectacular. There was a pile of snow by the trail 10 minutes before this photo was taken.
Closing Thought
The Stelvio’s paved climb is legendary, and rightly so. The so-called gravel Stelvio is a different beast entirely: rough, exposed singletrack that’s a real challenge even for experienced riders. If you’ve got the skills and setup, it’s an adventure. If you don’t, stick to the tarmac and save this one for later.
FAQs
Is the Gravel Stelvio suitable for beginners? → No, it is singletrack with exposure; only experienced riders should attempt it.
What bike is best for the Gravel Stelvio? → MTB ideal; 42–50 mm knobby tires minimum on gravel bikes.
Where does the Gravel Stelvio route connect? → It joins the paved Stelvio road near Umbrail Pass at 2,757 m.